
by Debasis Samanta
Java is a very powerful programming language to develop varieties of applications and makes the application development easy. Java provides a package of classes called the Abstract Windowing Toolkit (or also called the Advanced Window Toolkit ), which we will simply refer to as the AWT. It is an Object Oriented Graphical User Interface (GUI) frame work that allows the application developer to design modern, mouse controlled, graphical application interfaces. A basic overview of this package is shown in the Figure 7.1. This package is so vast that it is not possible to discuss in this Chapter about each class and to illustrate their uses. However, we will pick up only few (those are marked in bold type) of them as a token and will be illustrated their application.
The Layout managers and Components are known to be very popular to Java GUI programming. The Components is a group of classes which belong to the class Component. These classes are very much powerful to deal with buttons, menus, sliders, text field and etc. On the other hand, Layout Managers is the group of classes which are important for managing layout within window in various ways. Following two subsections are to explore these two things.
We will restrict our discussion with the following basic components:
			. Button 		. Checkbox 	 . Choice
			. Frame  		. Panel          . Scrollbar
			. Label 		. List 		 . TextField
			. TextArea
The main idea of using these classes is that to create the object of their type. Each class have their own constructors for initialization of the objects. When an object is created and initialized, it then can be placed on an applet by the add() method; this method is defined in their corresponding classes.
Following are 11 samples for illustrations of using these component. Readers are advised to test the illustrations.
 Illustration 7.1 (A) 			//  To create a button  //
	import java.applet.Applet;
	import java.awt.*;				// To import the Button class
	public class ButtonTest extends Applet {
		public void init( ) {
			Button  	b1,b2;			// Create two Button objects
			b1 = new Button ("Welcome"); 	// One button is initialized
			add (b1);			// Add it into the applet.
			b2 = new Button (  ); 		// Second default button
			add (b2);			// Add second button to the applet.
		   }
	}
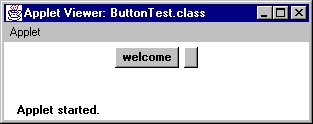
Note : Button class contains one default constructor where no argument has to be passed and a button will appear without any string label on it. One can change the label of a button at any time using the public void setLabel(String label) method defined in Button class. There is another function also defined as public String getLabel( ) to return the label of a button object.
Illustration  7.1 (B) 		// To create a check box  //

	import java.awt . *; 	// To import the check bon class.
	import java.applet. *;
	public class CheckboxText extends  Applet 	{
		public void init ( ) {
			Checkbox c1 = new Checkbox (  );	       // default constructor without any label
			Checkbox c2 = new Checkbox ( " Solaris 2.x");// Check box with default layout
			Checkbox c3 = new Checkbox ( "Macintosh", null, false);
			Checkbox c4 = new Checkbox ( "Windows 95", null, true);
			add (c1);
			add (c2);
			add (c3);
			add (c4);
		}
	}
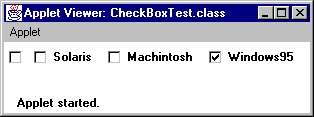
Note : This class has 3 constructors; one constructor with three arguments first for label, second for fencing type(default value is null) and third for initial state : false for deselected and true for selected.
Illustration 7.1 (C) 			//  To create Choice component   //

	import java.awt.*;
	import java.applet.*;
	public class ChoiceDemo extends Applet {
		public void init ( ) {
			int width = Integer.parseInt (getParameter( " width" ));
			int height = Integer.parseInt (getParameter(" height"));
						// To get the width and height of the applet.
			Choice os = new Choice ( ); 	//  os is an instance of choice class.
			Choice browser = new Choice ( );   // browser is the another instance.
			os.addItem ( " Windows 95" );
			os.addItem ( " Solaris 2.x " );
			os.addItem ( " Mac OS 7.5 ");
			browser.addItem (" Netscape Navigator 2.0");
			browser.addItem ( "Internet Explorer 4.0" );
			browser.addItem ("Hot Java ") ;
			add (os);
			add (browser );
			os.reshape ( 0, 0, width /2, height /2 );
			browser.reshape (0, height /2, width, height);
		}
	}
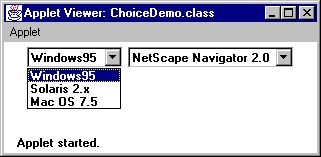
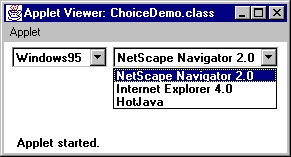
The Choice class is used for creating a pop-up selection menu. A Choice component is used to display menu item, each item in the menu is a String which appears as a left justified label in the order they are added to the Choice object. The Choice class uses addItem() to add new Strings to a Choice object. In the above example, two choice menus and their items are displayed. This time we have used the reshape() method to customarily place the choices on the applet view. It first two arguments are the left-top and remaining two argument are right-bottom coordinates.
Choice component can use other methods for selecting an item :

getSelectedItem (  ) 		Returns the string of the item itself
getSelectedIndex (  ) 		Return the index position of the item
select (int pos )		Selects an item by index position
select ( String name) 		Selects an item by name
In the Component class, there is Frame, a sub class of Window. This Frame class can be used to create a user defined frame. A frame is a window with a title and resize corners. The program given below creates a simple frame with a specific title, size and back ground color :
Illustration 7.1 (D)			// To create a frame //
	import java.awt.*;
	public class MyFrame {
		public static void main (String args[ ] ) {
			Frame frame =  new Frame ( " Frame in Java " );
			frame.resize (500, 500); 	                 // component method to resize the frame
			frame.setBackground (Color.blue );  // Background of the frame will be blue
			frame.show ( ) 		              // Method to show the frame on the screen
			}
		}
The program runs continuously. To quit press CTRL+C. It can be noted that, the show( ) and resize( ) methods must be called to make the frame visible.

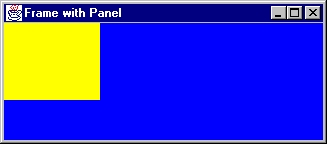
Panels like frames, provide the space for you to attach any GUI component, including other panels. Panels are created using the constructor Panel(). Once a Panel object is created, it must be added to a Window or Frame object in order to be visible. This is done using the add() method of the container class. The following program creates a small yellow panel, and adds it to a Frame object :
Illustration   7.1 (E)			// To create a panel //

	import java.awt.* ;
	public class MyPanel  {
		public static void main ( String args [ ] )  {
			Frame frame = new Frame( "Frame with panel");
			Panel panel = new Panel(  );
			frame.resize(200, 200);
			frame setBackground (Color.blue);
			frame.setLayout (null); 		// override default layout
			panel.resize (100, 100) ;
			panel.setBackground (Color.yellow );
			frame.add (panel); 		//  add the panel into the frame
			frame.show ( );			//   display the panel
		}
	}
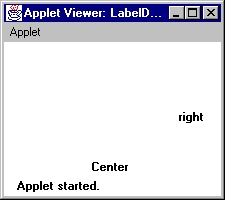
With the class Label, one can construct a label object with the string labeled that has to be displayed. An alternative constructor is provided to allow left, right, or center justification of the label text. Three constants LEFT, RIGHT, and CENTER are available for corresponding alignment. Here, is an example, that creates three labels, each with a different alignment.
Illustration 7.1 (F) 			//    To create label 	//

	import.java.awt.*;
	import.java.applet.*;
	public class LabelDemo extends Applet  {
		public void init ( ) {
			setLayout (null );
			int width = Integer.parseInt ( getParameter ("width" ));
			int height = Integer.parseInt (get.Parameter (" height" ));
			Label left = new Label ( );	 		// default alighment is left )
			Label center = new label (  " Center", Label.CENTER);    // For Centered alignment
			Label right = new Label("Right", Label.RIGHT); // for Right justified label

			// Add the labels on the applet //
			add(left);
			add (right );
			add (center );
			// Place the label properly on the applet; otherwise deafault placing will occur //
			left.reshape ( 0, 0, width, height/3);
			right.reshape(0, height/3, width, height/3);
			center.reshape (0, 2 * hight /3 , width, height /3);
		}
    }
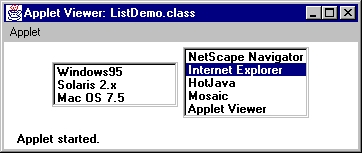
The List class provides a compact, multiple-choice, scrolling selection list. It can be noted that the Choice object shows only the single selected item in the menu, whereas, a List object can be constructed to show any number of choices in the visible window. Following is an applet to display two selection lists, one multiple choice and other single choice.
Illustration 7.1 (G) 			// To create a list //

	import java.awt.*;
	import java.applet.*;
	public class ListDemo extends Applet  {
	    public void init ( ) {
		setLayout (null ); 			// It is a default Layout setting
		int width = Integer.parseInt (getParameter (" width" ) );
		int height = Integer.parseInt (getParameter (" height" ) );

		List os  =  new List (3, true);   		// List object for list of Oss, multiple selection
		List browser  = new List (5, false);		// List object for list of Browsers, single choice

	// Add the Items into the lists
		os.addItem ( " Windows 95" );
		os.addItem ("Solaris  2.x " );
		os.addItem (" Mac OS 7.5 " );
		browser.addItem ("Netscape Navigator" );
		browser.addItem ("Internet Explorer" );
		browser.addItem ("Hot Java" );
		browser.addItem ("Mosaic" );
		browser.addItem ("Applet Viewer" );
		browser.select(1) ; 		// Second item in the Browser list is selected

	// Add and place the lists onto the applet
		add(os);
		add(browser);
		os.reshape (0, 0, width,   height /2 );
		browser. reshape ( 0, height /2, width, height /2 );
		}
	}
It can be noted that, the List class has two constructors namely :
		public List(  ); and
		public List ( int numberOfIemToDisplay, boolean multiSelectionChoice );
The first constructor is to create default list with no items and no selection, (when the list is created). Other constructor, comes in two varieties : one allows multiple selection with multiSelectionChoice as true; another with false behave exactly like a Choice such that it only accepts single (mutually exclusive ) selection.
Scroll bars are used to select continuous values between a given minimum and maximum and one can slide over this range. The scroll bar is either in vertical or horizontal orientation. Following is an example that creates both a vertical and an horizontal scroll bar :
Illustration 7.1 (H) 			// To create scroll bar  //


	import java.awt.*;
	import java.applet.*;
	public class ScrollDemo extends Applet {
	       public void init ( ) {
			setLayout( new Borderlayout ( ) );		// default border layout setting
			int width = Integer.parseInt (getParameter (" width" ));
			int height = Integer.parseInt (getParameter (" height"));
			Scrollbar hScroll = new Scrollbar ( Scrollbar. HORIZONTAL, 50, width /10, 0, 100 );
			Scrollbar vScroll = new Scrollbar ( Scrollbar.VERTICAL, 50, hight /2, 0, 100);
			add (hScroll );
			add (vScroll );
			}
	}

Note the numeric argument that have been passed to the Scrollbar constructor : First argument is to specify the kind of the scroll bar. Second argument dictate the starting position of the slider, third argument is to decide the proportion of the range that scroll bar will appear ie. 1/10th of the width of the applet for horizontal or ½ of the height of the applet view for vertical scroll bar. The last two arguments specify the minimum and maximum range ( for example, 1-12 for month , 1-31 for dates, 1 to 256 for colours etc.), we have taken 0 - 100 for something in both the scroll bar.
In the scroll bar class, therre are two methods vide :
setLineIncrement (int lineIncr ); andwith which one can specify the speed of the slider to be controlled to move one line or one page at a time on click on arrows at the ends in the scroll bar.
setPageIncrement (int pageIncr);
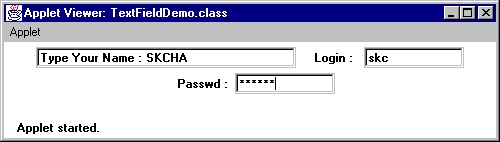
The TextField class can be used to implement a single line text input box. The constructors in this class allow you to create text fields of a specific character width and default values. The text is editable using keys and mouse selections. Also, this class can be used to accept text to echoing it or hide echoing just as in login and password entries. Following is an example towards the application of text field in an applet.
Illustration 7.1 (I) 			// To create Text field  //

	 import java.awt.*;
	 import java.applet.* ;
	 public class TextFieldDemo extends Applet 	{
		public void init ( ) {
			add ( new TextField("Type your Name", 20);
			// create a text field window of 20 character widths
			Label login = new Label ( "Login : " , Label.LEFT );
			Label pswd = new Label ( "Password : " , Label.CENTER );

			TextField log  = new TextField (8) ; 	// Text field for 8 characters
			TextField  pas = new TextField (8);
			pas.setEchoCharacter ( '*' ); 		// echo hide the type pass

			add (login);  add (log);  		// add labels in the applet and
			add (pswd );  add (pass );		//  add corresponding text fields
		}
	}
In the above example, note the use of setEchoCharacter() method which is used to mask the actual character on the screen.
The TextArea class, as its name suggests, is used when larger amount of text need to be input / displayed. Let us see the following illustration :
Illustration 7.1 (J) 			// To create text area  //

	import java.awt.*;
	import java.applet.*;
	public class TextAreaDemo extends Applet {
		TextArea text;
		String multiLineText =
		" To learn Java, you will first"
			+ " need to obtain \ n   two different pieces of  "
			+ "softwares : \ n "
			+ " The first is the JDK (Java Development Kit"
			+ "and \n the second piece of software "
			+ "is a Java capable browser."
			+ " \n JDK software is needed for Writing, "
			+ " Compiling, and Testing Java applet \n and
			+ " Applications.\n \n" ;
		public void init (  ) {
			 setLayout(null);
			 text = new TextArea (multiLineText, 20, 40);
			 add (text);
		}
	}
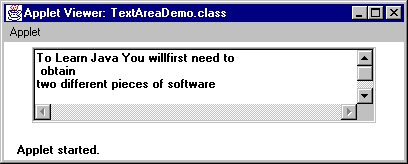
Here, the constructor TextArea (String text, int rows, int columns) where rows and columns are to describe the rows and columns in the text area, to be displayed.
So far we have discussed about various components and you can note that, where these components will be placed on the screen it has to specify explicitly. But this is very much tedious for laying large number of components. Thankfully, AWT includes the notion of Layout Managers : the layout of components in a container may be governed by a Layout Manager. A Container in Java is nothing but an applet which generally contains number of GUI attributes such as Frame, Panel, Label, Button etc. (which are individually known as Component). Each Container object has a Layout Manger which is an instance of any class that implements the Layout Manager interface. Thus, each component, such as a Panel, or a Frame has a default Layout Manager associated with it which may be changed by the Java developer when an instance of that container is created. Each Layout Manager keeps track of a list of Components. The Layout Manager is notified each time one adds a Component to a Panel, for example
Java has the following five predefined Layout Manager classes :
	. FlowLayout
	. BorderLayout
	. GridLayout
	. GridBagLayout
	. CardLayout.
Let us discuss about each of them
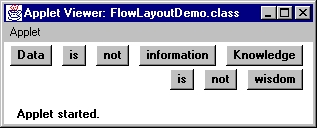
The most basic Layout Manager is the FlowLayout manager. The manager implements a simple layout style which is similar to how words flow in a text editor. Components are laid out from the upper-left corner, left to right and top to bottom. When no more components fit on a line, the next one appears on the next line. A small space is left between each component, above and below, as well as left and right; however, user can change this gap, alignment etc. The default gaps are five pixels and the default alignment is CENTER.
The applet example below adds several Labels to a Panel which is using FlowLayout with the justification set to RIGHT.
Illustration 7.2 (A) 			//    Flow layout Manager   //

	import java.awt.*;
	import java.applet.*;
	import java.util.*;
	public class FlowLayoutDemo extends Applet {
		public void init ( ) 	{
			setLayout (new FlowLayout (FlowLayout.RIGHT, 10, 3));
			String val =  " Data is not Information" +
					" is not knowledge is not wisdom";
			StringTokenizer str = new StringTokenizer (val );  		// Read a token from the String val
			while (str. hasMoreTokens ( ) ) {
				add (new Button (str.nextToken( ) ) );  // For one token add a label into the panel
			}
		}
	}
In the above example, the FlowLayout manager is invoked using the setLayout() method inherited from Component class. There are three forms of this method :
		setLayout (new FlowLayout ( ) ;				// with default value
		setLayout (new FlowLayout (FlowLayout.alignment)); 	// with user defined alignment
		setLayout (new FlowLayout (FlowLayout.alignment, int  hskip , int vskip ) );
				    // with alignment, horizontal and vertical skips setting
alignment is LEFT, RIGHT or CENTER, hskip and vskip are the spaces between two components horizontally and vertically respectively.
The BorderLayout Manager implement a common layout style which has five zones - each of these zones is named with a string North, South, East, and West represent the four sides, and Center is the middle area.
Here is an example of BorderLayout with component in each layout area in a frame.
	import java.awt.*;
	import java.applet.*;
	import java.util.*;
	public class BorderLayoutDemo extends Applet {
		public void intit ( ) {
			Frame frame = new Frame ( );
			frame.setLayout ( new BorderLayout (20,40));
			Button  buttonN, buttonS, buttonE, buttonW,  buttonC;

			buttonN = new Button ( " NORTH " );
			buttonS  = new Button ( " SOUTH" );
			buttonE = new Button ( " EAST" );
			buttonW = new Button (" WEST" );
			buttonC = new Button("CENTER");
			frame.resize (250,250); 	// resize the frame is height = 250 =pixels , width 250 pixels
			frame.add ( "North", buttonN );
			frame.add (" South ", buttons );
			frame.add ( "East", buttonE );
			frame.add (" West" , buttonW );
			frame.add("Center",buttonC);
			frame.show ( );
	    }
    }

Note : The coding difference for add() method can be noted. Using FlowLayout, the method was add(Component) but with BorderLayout, it is add(String position, Component comp), an overloaded variant.
Again, Border layout relies on the position String being case-sensitive. Passing "NORTH" or "north" instead of "North" will not work.
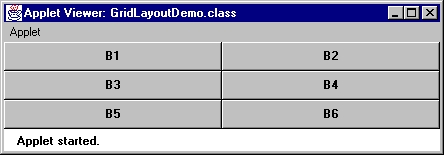
The GridLayout manager provides flexibility for placing components. You create the manager with a number of rows and columns. Components then fill up the cells defined by the manager For example, the following Illustration 7.2( C ) is to create an applet with three rows and three columns and containing 6 buttons :
 Illustration 7.2 ( C ) 			// Grid Llayout Manager //

	import java.awt.*;
	import java.applet.Applet;
	public class GridLayoutDemo extends Applet {
		Button b1,b2,b3,b4,b5,b6 ;
		public void init ( ) {
			setLayout (new GridLayout (3,2) ) ;		// 3 rows, 2 columns
			b1 = new Button ("B1");
			b2 = new Button ("B2");
			b3 = new Button ("B3" );
			b4 = new Button ("B4" );
			b5 = new Button ("B5" );
			b6= new Button ("B6" );
			add (b1); add (b2); add (b3);
			add (b4); add (b5); add (b6);
		}
	}
GridBagLayoutManager is the more flexible analog of GridLayoutManager. With this manager you can specify width, height etc. of individual grids in a container. It is not possible to illustrate this manager with a small example.
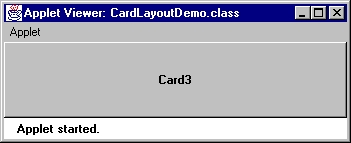
The Card Layout Manager is unique from the other layout managers in the sense that it represents several different layouts that can be thought of as living on separate index cards that can be shuffled so that any one card is on top at a given time. This can be useful for user interfaces that have optional components which can be dynamically enabled and disabled upon user input. The following program illustrates the use of CardLayout with five cards containing a single button each.
Illustration 7.2 (D) 			// Card layout Manager  //

	import java.awt.*;
	public class Crads extends java.applet.aApplet {
		CardLayout   layout;
		public void init ( ) {
			layout = new CardLayout ( ) ;
				setLayout (layout );
				add ("1", new Button ("Card1" ));
				add ("2", new Button ("Card2" ));
				add ("3", new Button ("Card3" ));
				add ("4", new Button ("Card4" ));
				add ("5", new Button ("Card5" ));
			   }
			public boolean key Down (Even e int key ){
				layout next (this);
				return (true );
				}
	    }
Note : The add() method used here to add cards to a CardLayout, and you have to use the labeled variety to pass a card name; in the above example 1,2
etc. are the name for five cards. Later, one can refer to cards by this name. Also note that a CardLayout variable (i.e. layout) was created. This is because, we actually need to refer to our CardLayout object after we have created it.
To demonstrate the ability to cycle through the cards, this applet was made to listen to the key board and select the next card whenever you press a key. This is a mechanism of event handling which is our next topic of discussion
All of the components we have created so far have looked right, but they have been essentially useless since we never talked about how to process the user input to these user interface controls. Suppose, there are a number of buttons in a container and each button is corresponding to a particular event. Thus, if a user selects a button then the system should respond accordingly and this type of GUI programming (this is why it is also known as Event Driven programming ). In this very section we will explore, how Java provides the programmers event handling capabilities.
In the context of Java events, an event is an asynchronous data generated by the window server and results from some device activity. The devices are usually mouse and keyboard. Examples of event include:
Windows events - Destroying , exposing, iconifying, deiconifying and moving windows.
Mouse events - Moving the mouse, dragging the mouse, having the mouse enter or exit a component, pressing a mouse button, and releasing a mouse button.
Keyboard events - pressing a key, and releasing a key.
List events - selecting or deselecting a list item.
Scrolling events - scrolling a line up or down, a page up or down, or scrolling to an exact location.
For all the above type of events, Java provides event handling method which is defined in Event class under AWT. In fact, for each kind of Component object in AWT, there is a handleEvent() method. When a device activity occurs that generate an event, the event is first sent to the component in which call to the event handler of the Component class. The event handler there after returns a boolean value either false or true depending on the event handling routine. If it returns false, the event is passed on to the component's parent (container). If the method returns true, it means that the component acted on the event and no more processing of the event takes place. Next we will see, what are the various event handling methods in Event class and their practical uses.
Event handler use number of information regarding the activity that took place. This information variables are defined in Event class. When an event occurs, the corresponding event object is instantiated and these variables are initialized. The variables includes :
Object target 	:  the component that originally received the event
long when  		:  the time stamp of when the event occurred
int id  		:  the type of this event
int X  		       	:  the X-coordinate of the event
int Y 		       	:  the Y-coordinate of the event
int key 	       	:  the key  that was pressed in a key board event
int modifier      	:  the state of  the modifier key (Shift, Control, Alt ).
int clickCount 	:  the number of consecutive clicks
Object arg 	       	:  an event dependent argument, that helps to identify the event causing GUI element (e.g.  the label of a  button etc).
The different event types possible are listed below :
Windows events : WINDOW_ICONIFY, WINDOW_ DEICONIFY, WINDOW_MOVED, WINDOW_DESTROY, WINDOW_EXPOSE.These events occurs when the corresponding activity is performed on a window object.Mouse events : MOUSE_ENTER, MOUSE_EXIT, MOUSE_MOVE, MOUSE_DRAG, MOUSE_UP, MOUSE_DOWN .These are generated by mouse actions within the borders of Canvas, Frame, and Panel components.
Focus events : GOT_FOCUS, LOST_FOCUS Generated as the mouse enters or exits the borders of a Canvas, Frame, or Panel Component. They are also generated as you click a mouse in a Text Component. Keyboard events : KEY_PRESS, KEY_ACTION, KEY_RELEASE, KEY_ACTION_RELEASE Generated by pressing or releasing keys on the key board when you are in a Frame, Canvas, Panel or Text Component. Action event : ACTION_EVENT Generated when you click on a Button, Choice, or CheckBox Component, Press Enter in a TextField, or double click on a List item. Scroll bar events : SCROLL_LINE_UP, SCROLL_LINE_DOWN, SCROLL_PAGE_UP, SCROLL_PAGE_DOWN, SCROLL_ABSOLUTE .Generated by actions involving the scroll bar in Scrollbar Component.
The id variable in the Event class will be initialized by the corresponding event type during the automatic instantiation of respective Event object.
Now, there are a number of event handling methods declared in Component class and Event class. The method handleEvent(Event evt) in Component class is the central event dispatcher for a component. This method for a given event type (evt.id ) calls the corresponding method. These methods are defined in Component class and summarized in Section 8.4 of this Chapter:
However, all these method can be called exclusively in applets/Application with the overridden code.

It can be noted that, there are few events which are generated by List and Scrolllbar components that do not have their helper functions. To handle these, it is required to override the handleEvent() method.
As an illustration let us consider the following example (Illustration 7.3) which creates 15-cells GridLayout and then the use of even handler namely action().
Illustration 7.3				// 15 puzzle - use of even handling methods  //

	import java.awt.*;
	import java.applet.*;
	public class EventDemo extends Applet {
		static final int n = 4;
		Label label;
		public void init(  ) {			// To initialize the applet for 16-cells grid
			setLayout (new GridLayout (n,n);		// To for 4x4 cells grid
			setFont (new Font ("Helvetica",  Font.BOLD, 24 ));   // Font of Helvetica of size 24
			for (int i =0; i < n; i++ ) 	{
					for (int j = 0; j < n; j++ ) {
					 int k = i * n + j;
							   if (k > 0)
					 add (new Button ("  " + k);      // Place a button at (i,j)-th cell
					}
			}
			label = new Label (" * " , Label.CENTER );
			label.setFont (new FONT (" Times Roman", Font.ITALIC, 24 ));
			add (label );
		}

		public boolean action(Event e, Object obj) {	       // Overridden event handler
				if (e.target instanceof  Button ) ) {	  //  Wait for clicking a button object
					label.setText ((String ) obj );  // Print the value of the Clicked butoon
				}
				return false ;
			}
	}
Whenever the applet EventDemo runs the event handler, namely, action(Event e, Object obj) will come into play till the user selects a button in the GridLayout, and it then returns false.

Note : Each event handling method returns boolean and they are in general public.
Java provides a good library for drawing various graphics object. In Java, Graphics objects (from the java.awt.Graphics class) have a method for displaying text, picture attributes and several other which are listed below :
Following is the illustration 7.4 to use few of these methods in an applet.public void drawLine (x1, y1, x2, y2 ); public void drawRect (x, y, width, height ); public void fillRect (x, y, width, height ); public void clearRect (x,y, width, height ); public void drawRoundRect (x, y, width, height arcWidth, arcHeight ); public void fillRoundRect (x, y, width, height arcWidth, arcHeight ); public void draw3DRect (x, y, width, height, boolean raised ); public void fill3DRect (x, y, width, height, boolean raised ); public void drawOval (x, y, width, height ); public void fillOval (x, y, width, height ); public void drawArc (x, y, width, height startAngle, arcangle ); public void fillArc (x, y, width, height startAngle, arcAngle ); public void drawPolygon (int [ ], xPoints, int [ ] yPoints ); public void drawString ( String s, x, y); public void drawChars (char data [ ], offset, length, x, y ); public void drawBytes ( byte data [ ], offset, length, x, y); public void drawBytes ( byte data [ ], offset, length, x,y );
Illustration 7.4 			// Graphics Test   //

	import java.awt.*;
	import java.applet.*;
	public class GraphicsText extends Applet 	{
		public void init (  ) {
			public void paint (Graphics g) {
				Dimension d = size ( ) ; 		// returns the width and height  of the applet
				g.setColor (Color.black );		// set the drawing color as black
				g.drawRect (0, 0, d.width-1, d.height -1);
				g.setColor (Color.blue);
				g drawRect (10, 10, d.width-10, d.height-10 );   // draw another inner blue Rectangle
				g.setColor (Color.red );
				g.drawOval (15,15, 50,50 );
				g.setColor( Color.yellow );
				g.fillOval ( 20, 20,40, 40 );
				g.setColor (Color.red );
				g.drawArc (230, 10, 50, 50, -90, 270 );
				g.fillArc (190, 10, 50, 50, -90, 270 );
				g.setColor (Color.pink );
				g.drawRoundRect (130, 70, 50, 50, 10, 10 );
				g.fillRoundRect (190, 70, 50, 50, 10, 10 );
				int [ ] xPoints  = 	{ 10,70,120,120,70,10,10 };
				int [ ] yPoints  = 	{ 130, 150, 130, 180, 170, 180, 130 };
				Color myColor = new Color (255,100,150);    // set a RGB color
							// A color can be choosed, R, G, B  integers ranges between  0 to 255
				g.setColor (myColor );
				g.drawPolygon (xPoints , yPoints, 7); 	// To draw a polygon with 7 points
				g.setColor (Color.gray );
				g.draw3DRect (10, 190, 50, 50, true );
				g fill3DRect (70, 199, 50, 50, true);
				g.setColor (Color.green );
				g.draw3DRect (130, 190, 50, 50, false );
				g.fill3DRect (190, 190, 50, 50, false );
		      }
	     }
	}
Graphics objects are also capable of displaying images; there is a number of methods in Component and Applet class dealing with image. Two methods are mentioned here :
getImage (URL url, String s ); Returns the image file img (say) having names and located at url. For stand alone machine, url is getDocumentBase( ).
drawImage (Image img; int x, int y, ImageObserver  observer );    This method requires an Image object and an ImageObserver observer.
Following is an example, which retrieves an image and displays it on an applet.
Illustration 7.5 			// Image display  //

	import java.awt.*;
	import java.applet.Applet;
	public class ImageDemo extends Applet  {
		Image myImage;
		public void init ( ) {
				myImage = getImage (getDocumentBase ( ), "graphics/title.gif " );
		}
		public void paint (Graphics g) {
			 g.drawString (myImage, 25, 25, this);
		}
	}
Here, we assume that an image file tille.gif is located in a directory graphics in the applet running machine. The getDocumentBase( ) method returns the URL url of the current machine.
The Graphics class is also very powerful handle string/font in several ways. But discussion of this is beyond the scope of this book.
Practice 7.1
This example shows how an applet code retrieve the value of parameters from .html file.

	AppletParameter.java


	import java.applet.*;
	import java.awt.*;

	public class AppletParameter extends Applet {
	private String strDefault = "Hello! Java Applet.";
	public void paint(Graphics g) {
	String strParameter = this.getParameter("Message");
	if (strParameter == null) strParameter = strDefault; g.drawString(strParameter, 50, 25);
	}
	}

	AppletParameter.htm

	< HTML>
	< HEAD>
	< TITLE>Passing Parameter in Java Applet

	< BODY>
	This is the applet:< P>
	< APPLET code="AppletParameter.class" width="800" height="100">
	< PARAM name="message" value="Welcome in Passing parameter in java applet example.">
	< / APPLET>
Practice 7.2
This example shows how to draw the different types of shapes like line, circle and rectangle.

	Java code of the program :.

	import java.applet.*;
	import java.awt.*;

	public class	CircleLine extends Applet{
	int x=300,y=100,r=50;

	public void paint(Graphics g){ g.drawLine(3,300,200,10); g.drawString("Line",100,100); g.drawOval(x-r,y-r,100,100); g.drawString("Circle",275,100); g.drawRect(400,50,200,100); g.drawString("Rectangel",450,100);
	}
	}

	HTML code of the program:

	< HTML>
	< HEAD>

	< BODY>
	< div align="center">
	< APPLET CODE="CircleLine.class" WIDTH="800" HEIGHT="500">
	< / div>
	< / BODY>
	< / HTML>
Practice 7.3
This program illustrates how to draw the different types of colorful shapes like line, circle and the rectangle.

Java code of the program

import java.applet.*;
import java.awt.*;

public class	ShapColor extends Applet{
int x=300,y=100,r=50;

public void paint(Graphics g){
g.setColor(Color.red);	//Drawing line color is red g.drawLine(3,300,200,10);
g.setColor(Color.magenta);
g.drawString("Line",100,100);

g.drawOval(x-r,y-r,100,100);
g.setColor(Color.yellow);	//Fill the yellow color in circle
g.fillOval( x-r,y-r, 100, 100 );
g.setColor(Color.magenta);
g.drawString("Circle",275,100);

g.drawRect(400,50,200,100);
g.setColor(Color.yellow);	//Fill the yellow color in rectangel

g.fillRect( 400, 50, 200, 100 ); g.setColor(Color.magenta); g.drawString("Rectangel",450,100);
}
}

HTML code of the program:

< HTML>
< HEAD>
< / HEAD>
< BODY>
< div align="center">
< APPLET ALIGN = "CENTER"	CODE = "ShapColor.class" WIDTH = "800" HEIGHT =
"500" >
< / div>
< / BODY>
< / HTML>
Practice 7.4
This program illustrates how to create choice in applet

Java code of the program

import java.awt.*;
import java.applet.*;
public class ChoiceDemo extends Applet {
    public void init ( ) {
	int width = Integer.parseInt (getParameter("width" ));
	int height = Integer.parseInt (getParameter("height"));

	Choice os = new Choice ( );
	Choice browser = new Choice ( );
	os.addItem ( " Windows 95" );
	os.addItem ( " Solaris 2.x " );
	os.addItem ( " Mac OS 7.5 ");
	browser.addItem (" Netscape Navigator 2.0");
	browser.addItem ( "Internet Explorer 4.0" );
	browser.addItem ("Hot Java ") ;
	add (os);
	add (browser );
	os.reshape ( 0, 0, width/2, height/2 );
	browser.reshape (0, height/2, width, height);
    }
}

HTML code of the program:
< HTML>
< HEAD>

< BODY>
< div align="center">
< APPLET ALIGN = "CENTER"	CODE = "ChoiceDemo.class" WIDTH = "800" HEIGHT = "500">
< PARAM name="width" value="400">
< PARAM name="height" value="500">
< / APPLET>
< / div>
< / BODY>
< / HTML>
Practice 7.5
This program illustrates how to create label

Java code of the program

import java.awt.*;
import java.applet.*;

public class LabelDemo extends Applet  {
    public void init ( ) {
	setLayout (null );
	int width = Integer.parseInt (getParameter ("width" ));
	int height = Integer.parseInt (getParameter ("height"));
	Label left = new Label();
	Label center = new Label("Center", Label.CENTER);
	Label right = new Label("Right", Label.RIGHT);

	add(left);
  	add(right );
	add(center );

	left.reshape ( 0, 0, width, height/3);
	right.reshape(0, height/3, width, height/3);
	center.reshape (0, 2 * height/3 , width, height/3);
    }
}

HTML code of the program:

< HTML>
< HEAD>
< TITLE>Passing Parameter in Java Applet< / TITLE>
< / HEAD>
< BODY>
This is the applet:< P>
< APPLET code="LabelDemo.class" width="800" height="100">
< PARAM name="width" value="200">
< PARAM name="height" value="300">
< / APPLET>
< / BODY>
< / HTML>
Practice 7.6

This program illustrates how to create text field

	Java code of the program

	import java.awt.*;
	import java.applet.* ;
	public class TextFieldDemo extends Applet 	{
	   public void init ( ) {
			add(new TextField("Type your Name", 20));

		Label login = new Label ( "Login : " , Label.LEFT );
		Label pswd = new Label ( "Password : " , Label.CENTER );

		TextField log  = new TextField (8) ;
		TextField  pas = new TextField (8);
		pas.setEchoCharacter ('*'); 	               // echo hide the type pass

		add (login);  add (log);
		add (pswd);  add (pas);
	   }
	}
	HTML code of the program:

	< HTML>
	< HEAD>
	< TITLE>Passing Parameter in Java Applet< / TITLE>
	< / HEAD>
	< BODY>
	This is the applet:< P>
	< APPLET code="TextFieldDemo.class" width="800" height="100">
	< / APPLET>
	< / BODY>
	< / HTML>
Practice 7.7
This program illustrates Flow layout manager

	Java code of the program

	import java.awt.*;
	import java.applet.*;
	import java.util.*;

	public class FlowLayoutDemo extends Applet {
		public void init ( ) 	{
		setLayout (new FlowLayout (FlowLayout.RIGHT, 10, 3));
		String val =  " Data is not Information" +
					" is not knowledge is not wisdom";
		StringTokenizer str = new StringTokenizer (val );

		while (str. hasMoreTokens ( ) ) {
			add (new Button (str.nextToken( ) ) );
			}
		  }
	}


	HTML code of the program:

	< HTML>
	< HEAD>
	< TITLE>Passing Parameter in Java Applet< / TITLE>
	< / HEAD>
	< BODY>
	This is the applet:< P>
	< APPLET code="FlowLayoutDemo.class" width="800" height="100">
	< / APPLET>
	< / BODY>
	< / HTML>
Practice 7.8
This example shows an Applet program which performs Addition, Subtraction, Multiplication and Division operations. To do these operations, this applet implements ActionListener interface and use four buttons for four operations.

	Java code of the program:

	import java.applet.*;
	import java.awt.event.*; import java.awt.*;

	public class EventListeners extends Applet implements ActionListener{ TextArea txtArea;
	String Add, Subtract,Multiply,Divide;
	int i = 10, j = 20, sum =0,Sub=0,Mul = 0,Div = 0;

	public void init(){
	txtArea = new TextArea(10,20);
	txtArea.setEditable(false);
	add(txtArea,"center");
	Button b = new Button("Add");
	Button c = new Button("Subtract");
	Button d = new Button("Multiply");
	Button e = new Button("Divide");
	b.addActionListener(this); c.addActionListener(this); d.addActionListener(this); e.addActionListener(this);

	add(b); add(c); add(d); add(e);
	}


	public void actionPerformed(ActionEvent e)
	{
	sum = i + j;
	txtArea.setText("");
	txtArea.append("i = "+ i + "\t" + "j = " + j + "\n"); Button source = (Button)e.getSource();
	if(source.getLabel() == "Add"){
	txtArea.append("Sum : " + sum + "\n");
	}

	if(i >j){
	Sub = i - j;
	}
	else{
	Sub = j - i;
	}
	if(source.getLabel() == "Subtract"){
	txtArea.append("Sub : " + Sub + "\n");
	}

	Mul = i*j;


	if(source.getLabel() == "Multiply"){
	txtArea.append("Mul = " + Mul + "\n");
	}

	if(i > j){
	Div = i / j;
	}
	else{
	Div = j / i;
	}

	if(source.getLabel() == "Divide"){
	txtArea.append("Divide = " + Div);
	}
	}
	}
	HTML code of the program:

	< HTML>
	< BODY>
	< APPLET CODE ="EventListeners" WIDTH="800" HEIGHT="500">< / APPLET>
	< / BODY>
	< / HTML>
Practice 7.9
This example shows an interactive applet for summing two numbers.

Java code of the program:

import java.awt.*;
import java.applet.*;
import java.awt.event.*;

public class InteractiveApplet extends Applet implements Runnable, ActionListener {
    TextField inputA, inputB;
	String s;
	int x = 0; int y = 0; int z = 0;
    Button b;

	public void init ( ) {
	inputA = new TextField(8);
	inputB = new TextField(8);
	b = new Button("Add");
	b.addActionListener(this);

	add(inputA); add(inputB); add(b);
	inputA.setText("0");   inputB.setText("0");

	Thread t = new Thread(this);
    t.start();
    }

	public void actionPerformed(ActionEvent e)
    {
              s = inputA.getText(); x = Integer.parseInt(s);
              s = inputB.getText(); y = Integer.parseInt(s);
			  z=x +y;
	 }
	public void run () {
	        for(;;)
			{
			try{
			Thread.sleep(100);
			}
			catch(Exception e){}
	        repaint();
			}
       }

    public void paint(Graphics g) {

        g.drawString("Enter two values", 10,50);
        s = String.valueOf(z); g.drawString("The sum is :",10,75);
        g.drawString(s, 100,75);

     }
}

HTML code of the program:

< HTML>
< HEAD>
< TITLE>Passing Parameter in Java Applet< / TITLE>
< / HEAD>
< BODY>
This is the applet:< P>
< APPLET code="InteractiveApplet.class" width="800" height="100">
< / APPLET>
< / BODY>
< / HTML>
Practice 7.10
This program illustrates displaying an image in an applet

Java code of the program:

import java.applet.*;
import java.awt.*;

public class AppletImage extends Applet{ Image img;
MediaTracker tr;
public void paint(Graphics g) {
tr = new MediaTracker(this);
img = getImage(getCodeBase(), "sample.JPG");
tr.addImage(img,0);
g.drawImage(img, 0, 0, this);
}
}

HTML code of the program:
< HTML>
< HEAD>
< / HEAD>
< BODY BGCOLOR="000000">
< CENTER>
< APPLET
code	= "AppletImage.class"
width = "500"
height	= "300">
< / APPLET>
< / CENTER>
< / BODY>
< / HTML>

Note: This example assumes that sample.JPG exists in the source folder
Practice 7.11
This program shows how to display the banner in applet.

	Java code of the program:

	import java.awt.*;
	import java.applet.*;

	public class SampleBanner extends Applet implements Runnable{ String str = "This is a simple Banner ";
	Thread t ;
	boolean b;
	public void init() {
	setBackground(Color.gray);
	setForeground(Color.yellow);
	}

	public void start() {
	t = new Thread(this);
	b = false;
	t.start();
	}

	public void run () {
	char ch;
	for( ; ; ) {
	try {
	repaint();
	Thread.sleep(250);
	ch = str.charAt(0);
	str = str.substring(1, str.length());
	str = str + ch;
	} catch(InterruptedException e) {}
	}
	}
	public void paint(Graphics g) { g.drawRect(1,1,300,150); g.setColor(Color.yellow);
	g.fillRect(1,1,300,150); g.setColor(Color.red); g.drawString(str, 1, 150);
	}
	}

	HTML code of the program:

	< HTML>
	< BODY>
	< APPLET CODE = "SampleBanner" WIDTH = "500" HEIGHT = "300">< / APPLET>
	< / BODY>
	< / HTML>
Practice 7.12
This example displays the time in an applet in the time format like:	hours, minutes and then seconds (hh:mm:ss).

	Java code of the program:

	import java.applet.*; import java.awt.*; import java.util.*;

	public class ClockApplet extends Applet implements Runnable{ Thread t,t1;
	public void start(){
	t = new Thread(this);
	t.start();
	}

	public void run(){
	t1 = Thread.currentThread();
	while(t1 == t){ repaint(); try{
	t1.sleep(1000);
	}catch(InterruptedException e){}
	}
	}

	public void paint(Graphics g){
	Calendar cal = new GregorianCalendar();
	String hour = String.valueOf(cal.get(Calendar.HOUR));
	String minute = String.valueOf(cal.get(Calendar.MINUTE));
	String second = String.valueOf(cal.get(Calendar.SECOND));
	g.drawString(hour + ":" + minute + ":" + second, 20, 30);
	}
	}

	HTML code of the program:
	< HTML>
	< BODY>
	< div align = "center">
	< APPLET CODE = "ClockApplet" WIDTH = "500" HEIGHT = "400">< / APPLET>
	< / div>
	< / BODY>
	< / HTML>
Practice 7.13
This applet shows a rectangle that will change color when the mouse moves over it.


Java code of the program:

import java.awt.*;
import java.applet.*;
import java.awt.event.*;

public class MouseMotionExample extends Applet implements MouseMotionListener
{
 // The X-coordinate and Y-coordinate of the last Mouse Position.
     int x;
     int y;

     int rect1x,rect1y,rect1width,rect1height;
     boolean rect1Active;

     public void init()
     {
          rect1x = 20;
          rect1y = 20;
          rect1width =100;
          rect1height= 80;
          addMouseMotionListener(this);
     }

     public void paint(Graphics g)
     {
          if (rect1Active)g.setColor(Color.green);
          else g.setColor(Color.red);
          g.fillRect(rect1x,rect1y,rect1width,rect1height);
          g.setColor(Color.blue);
          g.drawString("("+x+","+y+")",x,y);
     }

   // This will be excuted whenever the mousemoves in the applet

    public void mouseMoved(MouseEvent me)
     {
          x = me.getX();
          y = me.getY();
      	    // Check if the mouse is in the rectangle
      if (x > rect1x && x < rect1x+rect1width && y > rect1y && y < rect1y+rect1height)
               rect1Active = true;
          else
              rect1Active = false;
              //show the results of the motion
          repaint();
     }
     public void mouseDragged(MouseEvent me)
     {
     }
  }

HTML code of the program:

< HTML>
< HEAD>
< / HEAD>
< BODY>
< div align="center">
< APPLET ALIGN = "CENTER"	CODE = "MouseMotionExample.class" WIDTH = "800" HEIGHT = "500">
< / APPLET>
< / div>
< / BODY>
< / HTML>
Practice 7.14
This applet draws an arc with mouse.


Java code of the program:

import java.applet.*;
import java.awt.*;
import java.awt.event.*;
import java.util.*;

public class MouseArc extends Applet
   implements MouseListener, MouseMotionListener {

   int width, height;
   Vector listOfPositions;

   public void init() {
      width = getSize().width;
      height = getSize().height;
      setBackground( Color.black );
      listOfPositions = new Vector();
      addMouseListener( this );
      addMouseMotionListener( this );
   }

   public void mouseEntered( MouseEvent e ) { }
   public void mouseExited( MouseEvent e ) { }
   public void mouseClicked( MouseEvent e ) { }
   public void mousePressed( MouseEvent e ) { }
   public void mouseReleased( MouseEvent e ) { }
   public void mouseMoved( MouseEvent e ) {

      if ( listOfPositions.size() >= 50 ) {
         // delete the first element in the list
         listOfPositions.removeElementAt( 0 );
      }
      // add the new position to the end of the list
      listOfPositions.addElement( new Point( e.getX(), e.getY() ) );
      repaint();
      e.consume();
   }
   public void mouseDragged( MouseEvent e ) { }

   public void paint( Graphics g ) {
      g.setColor( Color.white );
      for ( int j = 1; j < listOfPositions.size(); ++j ) {
         Point A = (Point)(listOfPositions.elementAt(j-1));
         Point B = (Point)(listOfPositions.elementAt(j));
         g.drawLine( A.x, A.y, B.x, B.y );
      }
   }
   }


HTML code of the program:

< HTML>
< HEAD>
< / HEAD>
< BODY>
< div align="center">
< APPLET ALIGN = "CENTER" CODE = "MouseArc.class" WIDTH = "800" HEIGHT = "500">
< / APPLET>
< / div>
< / BODY>
< / HTML>
Practice 7.15
This applet generates color spectrum.


Java code of the program:

import java.applet.*;
import java.awt.*;

public class ColorSpectrum extends Applet {

   int width, height;
   int N = 25;          // the number of colors created
   Color[] spectrum;
   Color[] spectrum2;
   public void init() {
      width = getSize().width;
      height = getSize().height;
      setBackground( Color.black );
      spectrum = new Color[ N ];
      spectrum2 = new Color[ N ];

      // Generate the colors and store them in the arrays.
      for ( int i = 1; i <= N; ++i ) {
         // The casting to (float) is done so that the divisions will be
         // done with floating point numbers, yielding fractional quotients.

         // As i goes from 1 to N, this color goes from almost black to white.
         spectrum[ i-1 ] = new Color( i/(float)N, i/(float)N, i/(float)N );

         // As i goes from 1 to N, this color goes from almost pure green to pure red.
         spectrum2[ i-1 ] = new Color( i/(float)N, (N-i)/(float)N, 0 );
      }
   }

 public void paint( Graphics g ) {
      int step = 90 / N;
      for ( int i = 0; i < N; ++i ) {
         g.setColor( spectrum[ i ] );
         g.fillArc( 0, 0, 2*width, 2*height, 90+i*step, step+1 );
         g.setColor( spectrum2[ i ] );
         g.fillArc( width/3, height/3, 4*width/3, 4*height/3, 90+i*step, step+1 );
      }
   }
}
HTML code of the program:

< HTML>
< HEAD>
< / HEAD>
< BODY>
< div align="center">
< APPLET ALIGN = "CENTER"	CODE = "ColorSpectrum.class" WIDTH = "800" HEIGHT = "500">
< / APPLET>
< / div>
< / BODY>
< / HTML>
Practice 7.16
This applet reduces flickering while painting with mouse dragging. Here, backbuffer is used to store results of drawing operations.

Java code of the program:

import java.applet.*;
import java.awt.*;
import java.awt.event.*;

public class BackBufferPaint extends Applet
   implements MouseMotionListener {

   int width, height;
   Image backbuffer;
   Graphics backg;

   public void init() {
      width = getSize().width;
      height = getSize().height;

      backbuffer = createImage( width, height );
      backg = backbuffer.getGraphics();
      backg.setColor( Color.black );
      backg.fillRect( 0, 0, width, height );
      backg.setColor( Color.white );

      addMouseMotionListener( this );
   }
   public void mouseMoved( MouseEvent e ) { }
   public void mouseDragged( MouseEvent e ) {
      int x = e.getX();
      int y = e.getY();
      backg.fillOval(x-5,y-5,10,10);
      repaint();
      e.consume();
   }

   public void update( Graphics g ) {
      g.drawImage( backbuffer, 0, 0, this );
	  }
   public void paint( Graphics g ) {
      update( g );
   }
}
HTML code of the program:

< HTML>
< HEAD>
< / HEAD>
< BODY>
< div align="center">
< APPLET ALIGN = "CENTER"	CODE = "BackBufferPaint.class" WIDTH = "800" HEIGHT = "500">
< / APPLET>
< / div>
< / BODY>
< / HTML>
| Write an applet which takes input from user and performs basic mathematical operations on the inputs and shows the result. | |
| Write an applet which takes the input - a text and font color from the user and displays the text in the selected color. | |
| Write an applet which prompts for dimension of circle/square/rectangle and displays the figure with proper dimension. After some time, figure will vanish from the screen and again ask to enter dimension of the figure. |
| What are AWT peers? | |
| A component is associated with a standard AWT button object, a peer object and an interfacing button object constructed per the native GUI. | |
| What are the different types of controls in AWT? | |
| The AWT supports the following types of controls:
Labels, Pushbuttons, Checkboxes, Choice lists, Lists, Scroll bars, Text components These controls are subclasses of component. | |
| What is difference between Swing and AWT in Java? | |
| Swing is a considered as light weight and AWT is considered as heavy weight. Another difference between AWT and Swing is that, Swing offers uniform look and feel across platform while look and feel of AWT GUI application are platform dependent because AWT mostly use native components e.g. a AWT windows will look different in DOS and Windows operating system. | |
| What interface is extended by AWT event listener? | |
| The java.util.EventListener interface is extended by all the AWT event listeners. | |
| What is the default layout for Applet? | |
| The default layout manager for an Applet is FlowLayout, and the FlowLayout manager attempts to honor the preferred size of any components. | |
| Name Components subclasses that support painting? | |
| The Canvas,Frame,Panel and Applet classes support painting. | |
| What is difference between BorderLayout and GridLayout ? | |
| BorderLayout and GridLayout are two widely used LayoutManager from Swing API, former arranges components in predefined position e.g. NORTH, SOUTH, EAST and WEST while later arranges components one after other until there is space and wraps them afterwards. | |
| What is the lifecycle of an applet? | |
init() method can be called when an applet is first loaded. start() method can be called each time an applet is started. paint() method can be called when the applets is minimized or maximized. stop() method can be used when the browser moves off the applets page. destroy() method can be called when the browser is finished with the applet. | |
| Why is Model-View-Controller Architecture used in Swing? | |
| Model-View-Controller Architecture is used to show the design of the components that are made up of three elements and these elements show the behavior of components as:
Model:
It consists of the state of individual component. Different models are used for different components for example scrollbar component that consists of the information used to display the current position and the values that are associated with it. Menu, can consists of a simple list containing the menu items that user can select and take actions on. This information doesn't change from component to component and it remains the same in every case. The model remains independent of the visual representation of the component.
| |
| What is the difference between exclusive and non exclusive? | |
|
Exclusive: Only one among a group of items can be selected at a time. If an item from the group is selected, the checkbox currently checked is deselected and the new selection is highlighted. The exclusive Checkboxes are also called as Radio buttons.
Non Exclusive: Checkboxes are not grouped together and each one can be selected of the other. | |
| What is the difference between choice and list? | |
|
A choice is displayed in a compact from that requires you to pull it down to see the list of available choices and only one item may be selected from a choice. A list may be displayed in such a way that several list items are visible and it supports the selection of one or more list items. | |
| Why Swing is called light weight ? | |
| Most of Swing component are inherited form JComponent and doesn't required a native peer and that's why they are referred as light weight component. light weight component implement look and feel in Java rather than using look and feel of native component and that's why Swing's look and feel remains same across platform. | |
| How will you communicate between two applets? | |
| By creating URL objects, URLConnection object and getting InputStream, OutputStream Using getInputStream(), getOutputStream(). | |
| Which method is called by applet class to load an image? | |
| getImage(URL object, filename) is used for this purpose. | |
| What is the relationship between clipping and repainting? | |
| When a window is repainted by the AWT painting thread, it sets the clipping regions to the area of the window that requires repainting. |
![]()
![]()